FILM THICKNESS MEASURING SYSTEM
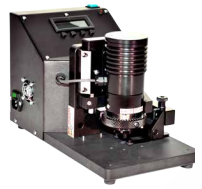
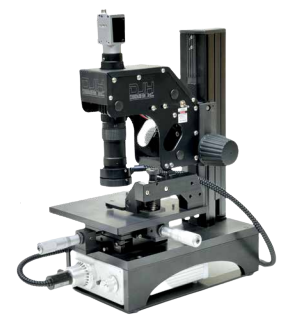
The film thickness system has been developed with both the Production line and Quality Control Laboratory in mind. Advanced computer programmed motion control results in repeatability with an excellent degree of accuracy.


Features and Benefits
- Eliminates operator error
- Repeatable/Consistent results from machine to machine, site to site, and operator to operator.
- Environmentally safe, no solvent, containments, to dispose of
- System requires no calibration for different substrate materials
- System can be expanded to meet other requirements such as defect inspection
- Low Maintenance
- Quick and Accurate
- Optical/video equipment can be used for other purposes
- (i.e. substrate surface defects,
paint film defects, etc - System can be used to measure thick films (up to 12 Mil (300 microns) using optional bit
- Can Read primer & Top coat film at one time
- Active Calibration System automatically adjusts for changes in the magnification of the MonoZoom
- DJH View Software with Multi point Averaging, gives consistent results (Refer to DJH View Software overview)
DJH VIEW OVERVIEW
DJH View, delivering the power and flexibility you need for today’s demanding imaging applications.
This powerful 32 bit application runs under the Windows 7 operating system, capturing your images in outstanding Hi-Resolution colour. DJH View is the efficient way to replace today’s document process. Whether your current methods are, film or thermal paper based, these outdated processes are expensive, difficult, and time consuming to manage. DJH View is the perfect answer to replace these aging methods, providing you with an efficient all in one solution to your imaging and archival needs.
DJH View is a powerfully integrated all-in-one package, with a full array of imaging, archival, and reporting tools. Imagine being able to capture images, annotate, measure, print, store, and retrieve previously saved images without ever having to leave the program. No switching between applications, no cutting and pasting, no worries about where did I save that image? DJH View supports Windows MDI (Multiple Document Interface) protocol, this means that you can actually open, and or capture several different images into several document windows, and have them all open at the same time. This give you the flexibility to compare images, or capture a series of images and come back to work on them when it is convenient. Other non MDI compliant programs will only allow you to work on one image at a time. This means if you want to capture a series of images you must capture one image save it then go back and capture the next image. With DJH View if you want 6 images in a series, you would simply open 6 document windows on the program desktop, click on the capture icon, click on OK to capture the required image, then one mouse click on the next document you want to use, click on capture, select
OK when you have the sample view you desire, and on to the next one. In this manor a series can be quickly captured, and then your attention can be focused to working on the saved images. When you have completed your tasks you can print off the images and or store them in the ODBC (Open Data Base Concept) compliant database for future retrieval. ODBC compliance ensures that your data is accessible from a wide variety of sources.
IMAGE CAPTURE AND LIVE ENHANCEMENT TOOLS
Capturing images is just a mouse click away.
From the main program desktop click on the camera icon, this will bring you to the preview window. Your images are displayed in a large preview window in 24 bit true colour. This preview window is also a real time display with full 30 fps (Frames Per Second) refresh rate (for comparison, Television shows are typically filmed at 20 fps, and Motion Pictures for the theatre are usually filmed at 15fps). 30fps refresh means full motion, no jerky action, that makes the task of locating, and focusing on the sample or sample region effortless.
The DJH View program incorporates several key real time controls that enables you to actively adjust the Contrast, Brightness, Colour Hue, and Saturation levels with the easy to use slide controls. And since you are working in real time, you can instantly see the effect these changes make to viewing your samples. Once you have adjusted the image details to suite, you would simply click on OK, and your image is instantly digitized and transferred to the current working document. We have also added a “Save as Default” button that you can use to save a setup for repetitive use. You can always return to the original factory default settings by clicking on the default button next to each enhancement tool.
Another key feature of the DJH View system is the ability to use overlays. Our capture hardware supports the use live overlays, in a future release we will include an update that will allow you to perform functions, such as being able to do a measurement on the live image, or create a template to check samples for conformity without having to capture the image each time.
UNBEATABLE MEASUREMENT TOOLS
DJH View provides an unmatched collection of measurement tools, highly accurate, very powerful, and unequalled.
DJH View also incorporates another very important feature; while many software packages support the use of multiple camera sources; we have taken this one step further. DJH View also includes multiple calibration support, in fact up to nine different calibrations can be stored, enough to handle even your most demanding applications. We have also included support for zoom microscopes with our support for encoder inputs. Calibrations can be mixed for zoom and fixed lens support. Each calibration can be uniquely named for easy reference.
Switching calibrations can be done on the go, without having to shut down the application and restart for the new calibrations to take effect. Let’s say you are in the middle of working on one sample, you want to change lenses and take another sample that requires a different magnification, no problem. Open a new document window click on the Zoom menu and open the change lens dialog window, a simple drop down window is displayed with all the available lens setups you have stored, click on the calibration you need and you’re done. Click on the capture window, digitize the image, and you are ready to measure. No need to shut down the program and restart, no need to close the previous image. Built in encoder support makes working with Zoom microscopes a snap. With encoder support enabled you only need to calibrate the zoom once, the software will ask you to calibrate several point along the zoom path from the lowest setting to the highest setting, once this is complete the software will read positional data from the encoder and actively calculate the correct calibration for your current setting. Measurements can be made in; inch, mm, micron, or mils. 10x factoring is also supported for the Film build industry when using instruments such as DJH Designs ASTM standard testing method, “Crater” Film Build System.
OUR STANDARD COLLECTION OF TOOLS
Angle
This convenient and powerful tool allows for angular measurements in degrees on any component, object or section where angle measurement are required.
4 Point Average
The 4 point tool creates a floating cross hatch on the screen over the active document window. The cross hatch is at this point interactive with the mouse cursor. Place the cursor over any point on the subject and click the left mouse button to drop the cross hatch onto the image. This tool can operate as a simple cross hair measurement tool for aligning and measuring between any two points along the X or Y axis, or as multi point averaging tool. For measurements of coatings or plating layers using both X and Y to define 4 measurement points. You can measure up to 5 layers at a time displaying both the 4 point average and actual individual readings for each marker.
8 Point Average
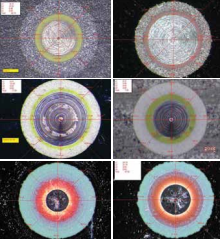
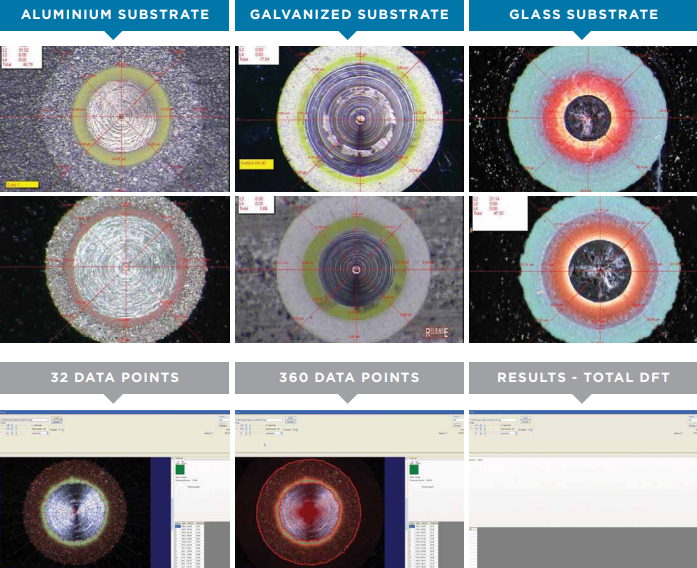
For consistency, the 8 point tool is a multi-axis measurement tool designed primarily for measurement of coating thickness on cross sections of rounds objects or for use with instrument such as DJH Designs ASTM standard testing method, “Crater” Film Build System. The 8 point tools creates a floating multi axis cross hatch. The cross hatch is interactive with the mouse cursor allowing for easy placement of the cross hatch on the subject. This multi axis tools gives you up to eight points of reference with the ability marking up to five layers at a time on each reference axis. The system can display both the 8 point average and actual individual readings for each marker. An overall coating/plating thickness dimension is also displayed. The 8 point point average tool takes the guess work out of measuring your film samples
Point To Point
This freehand tool allows the user to make quick and precise measurements between any two points on the image. Simply click on the first point to mark the beginning of the segment. Now simply click on the end point. A line is now drawn out from the origin to the termination point and a segment length is displayed.
Parallel Line
Accurately measure any parallel related items between to variable length parallel lines. This type of measurement is useful for the measurement of plating’s or coating layers. Unlimited number of parallel line tools can mark on the image taking measurements over a wide sample area. Measure multiple layer coatings with ease, each parallel line tool can measure up to 5 layers at a time. The parallel line tool can also be used for measurement of weld penetrations, used in conjunction with the
3 point arc tool you can easily measure weld penetration on cross sections taken from welds on tubular materials.
Radial
Radial dimensioning, the circle tool is used to determine the radii of circular objects or sections. i.e. to measure the radius of the etched holes in printed circuit boards. This tool is also useful for customers wanting to measure the tip radius of items such as cutting tools to determine edge sharpness. The circle tool is also used as a 3 point arc tool to help in determination of weld sections on tubing where you are unable to see the tubing wall in the weld area, simply select three point along the visible wall the tool will calculate and draw the circle to the correct diameter. You now have a guide to determine the start point for doing weld penetration measurements. You can leave the program generated circle on screen and open the parallel line tool to complete themeasurement. The circle tool also functions as a multi-layer tool. This makes measurementsof items such as wall thickness a snap. With the ability of measuring up to five layers at a time even measurements of coatings on tube or round objects is made easy
DJH VIEW UPDATE – WHAT’S NEW
DJH View Version 8 is the next generation of the film thickness measurement system, built around the core product which makes using the system an easy transition for existing customers to adapt to the technology. At the heart of the new system is DJH View Version 8. In the past with all versions including version 7 all measurement is done manually by the operator. The operator captures the image and then makes the determination of the layers by his interpretation of the interface between the coating layers. While not a slow process it does take time to properly position the 8 points on each layer. For a two layer system that is sixteen data points in total. Positioning of the points is also key and is subjective to the operator. Proper training does result in good correlation between operators but there is always a subjectivity to the placement of the layers. Version 8 eliminates the need for the operator to interpret the layers. Using advanced algorithms and image processing the operator selects the product from a drop down menu captures the image and clicks on the process button. The software analyses the image and will place the markers; up to 360 data points per layer can be selected for the ultimate in accuracy, with results being delivered in less than 2 seconds

